Basics of Shaper
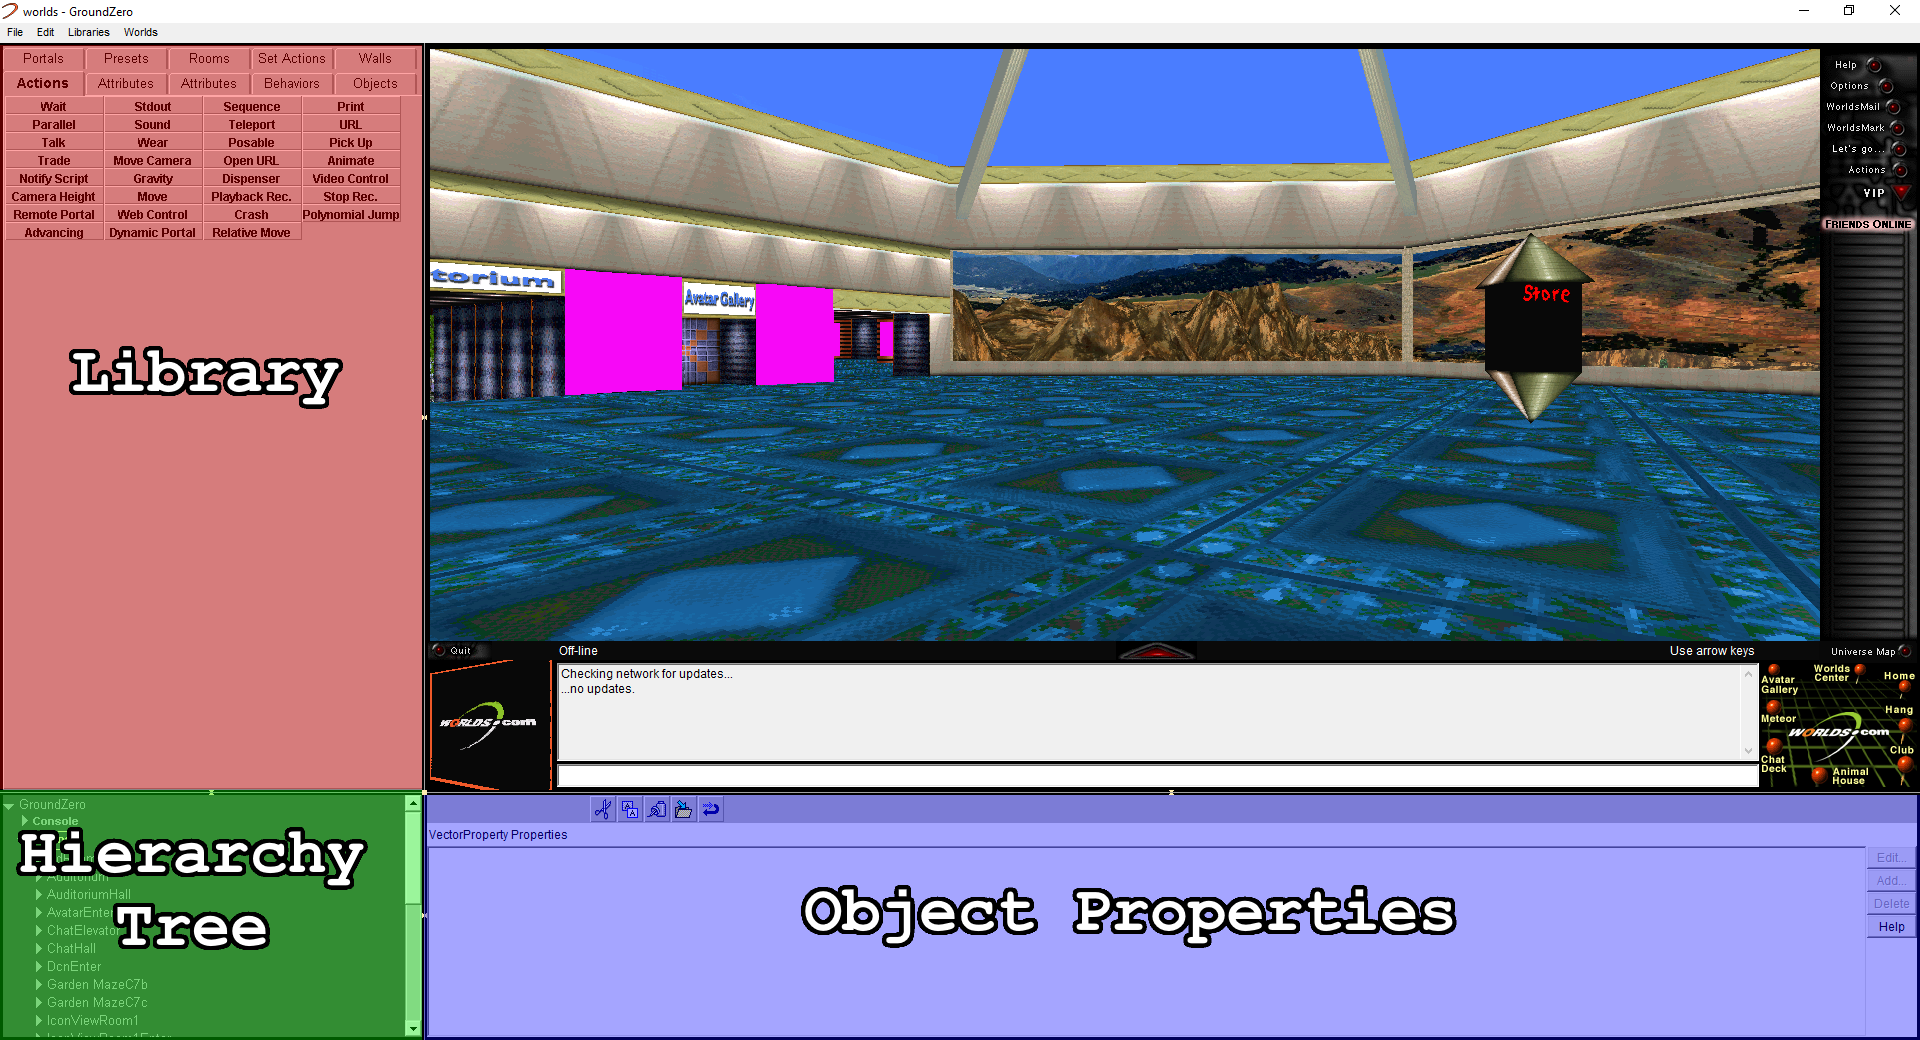
To follow along on this page, make sure you've edited your worlds.ini file to enable Shaper.
Once enabled, you can turn the Shaper interface on and off by clicking "Options" and then "Shaper On/Off".

You can customize the layout in two ways: clicking the border between two sections will swap them and dragging the square point where all 4 sections meet will resize them.
I personally prefer to swap the Hirearchy Tree with the Library, so all further screenshots will be like that.
Selecting Objects
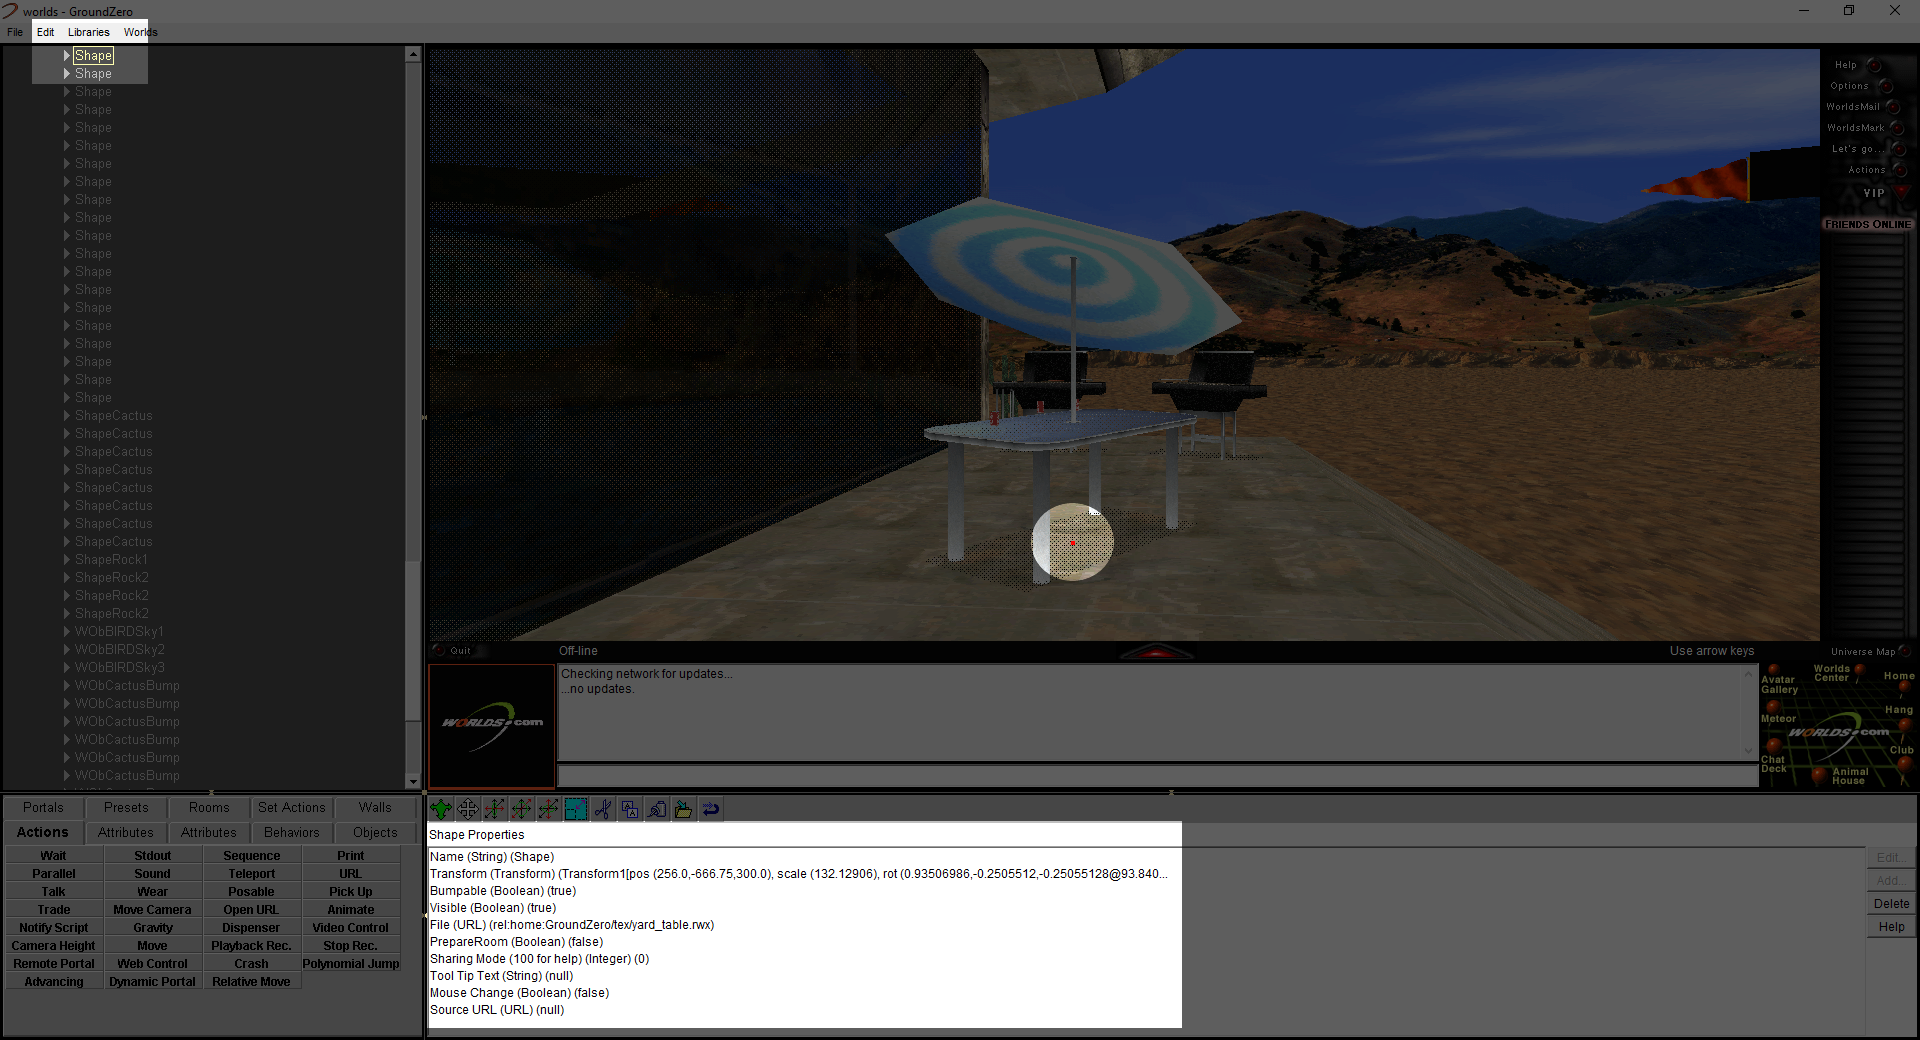
The best way to learn about Shaper is to play around with it. You can inspect the properties of any object by right clicking it in the world and selecting "Edit Properties..."

When you select an object, noticed that it will be selected in the hierarchy tree, have a red dot at its origin point, and its properties will be displayed.
Pro Tip:The "Name" proprty is always the top item in a selected item's properties. It is a good idea to give everything in your world a meaninful name to make it easier to work with later. Select "World1" in the hierarchy tree and you can set a name for your world. If your hierarchy tree is still showing a previous world, select "File" then "World Properties..." to update it to your current location.
Start a New World
To create a brand new world from scratch, click "File" in the top left and select "New", and you will immediately be brought to a default room in a new world.