Articulated Avatars
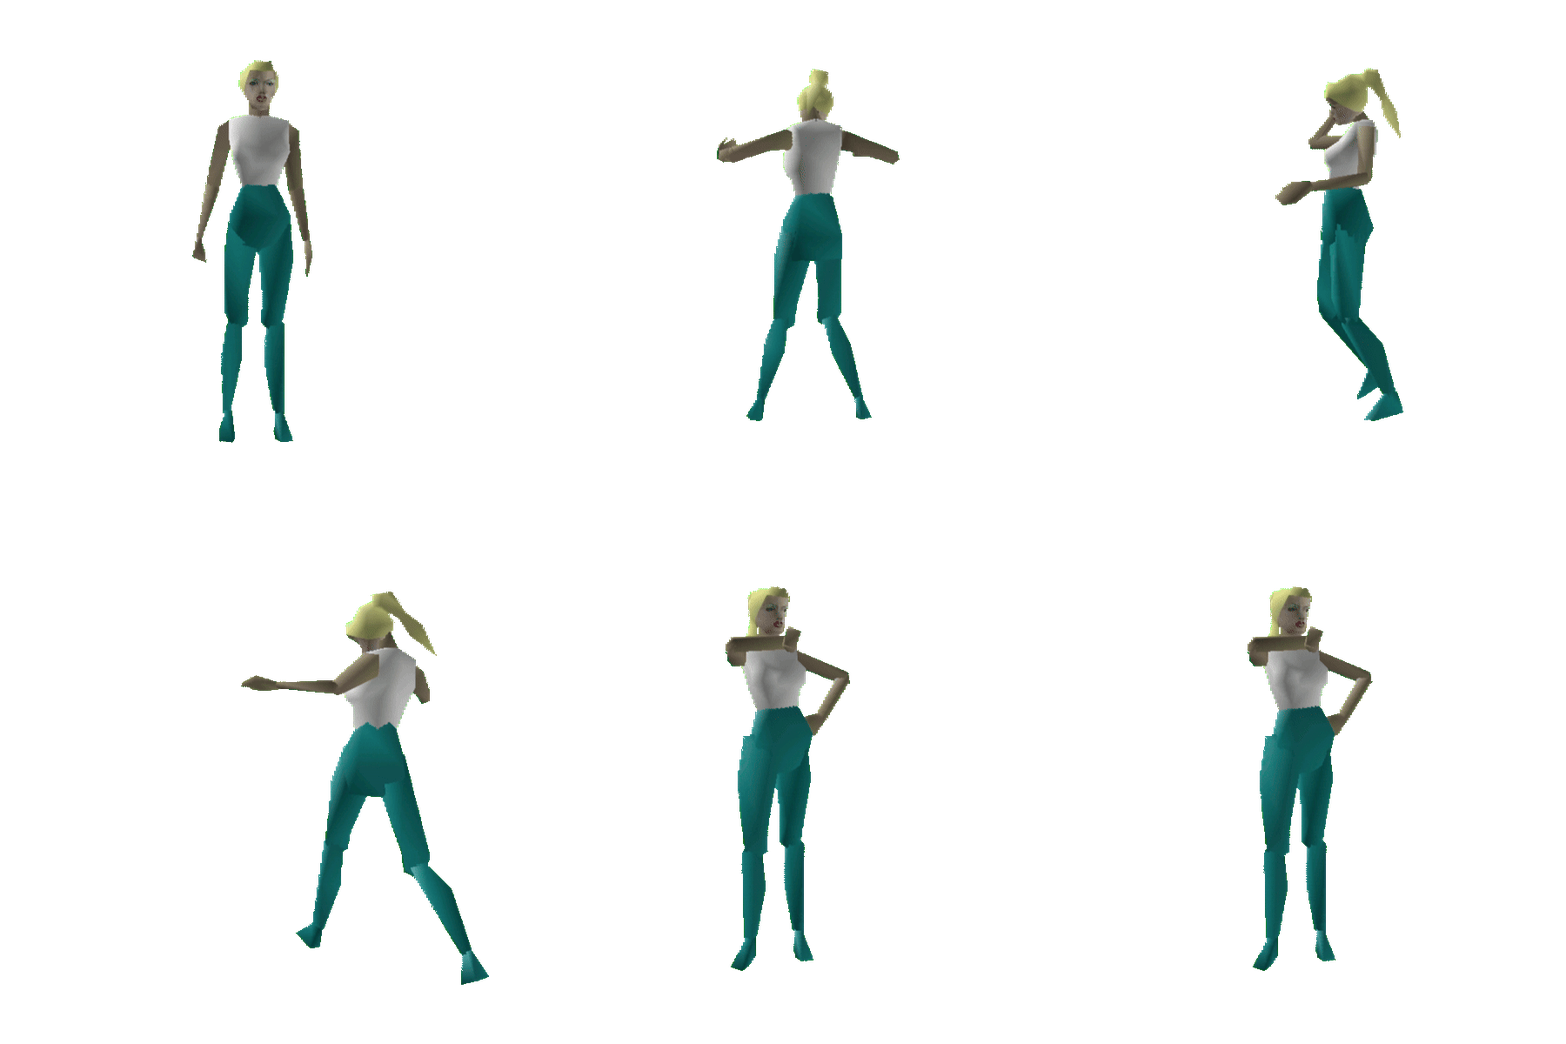
Also known as VIP avatars, these are the customizable, animated avatars that you see many Worlds regulars wearing.

Basic customization of these avatars can be done in a World like the Gallery of Metamorphics, but greater customization comes from manipulating the avatar string itself.
VIP avatars use an avatar string, which is a large code that defines each piece of the model. This string can be found in your Worlds.ini file or in Shaper by inspecting an avatar.
Avatar strings always start with avatar: followed by the name of the
avatar base model. A list of avatar names can be found here along with a list of
abbreviated versions, which are useful for customization.
In a non-customzied avatar, the string would just end with the .rwg file extension.
To customize the avatar, add .0E after the base avatar name. For example,
avatar:dude.rwg becomes avatar:dude.0E.rwg. Now customization
is enabled for this string.
Texturing
Directly after 0E comes the texture slots. Each texture here gets assigned a letter a through z,
so that they can be used multiple times in the remaining string. For example, avatar:dude.0EC_AT6wav.rwg
puts the color C_A in texture slot a and the texture T6wav in slot b.
Body Parts
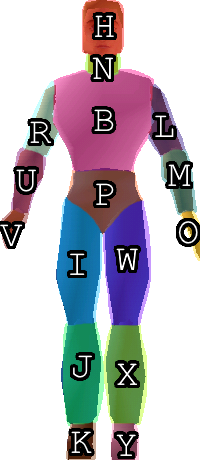
After the texture slots, you can customize each body part. Each bodypart is assigned a captital letter that starts its section of the avatar string:
| H | Head |
| N | Neck |
| B | Body (Torso) |
| L | Left shoulder |
| M | Left forearm |
| O | Left hand |
| R | Right shoulder |
| U | Right forearm |
| V | Right hand |
| P | Pelvis |
| W | Left thigh |
| X | Left calf |
| Y | Left foot |
| I | Right thigh |
| J | Right calf |
| K | Right foot |
| Z | Tail |

For example, to customize the torso, we use the letter B for Body: avatar:dude.0EC_ABa.rwg.
The lower case a means we are using the texture in slot a (C_A) on the B (torso) bodypart.
You can also texture a part individually without using a texture slot. Simply put the texture or color after the bodypart.
For example, avatar:dude.0EC_ABa.rwg is equivalent to avatar:dude.0EBC_A.rwg
Blinking
If we add multiple textures to a part, that part will switch between them, or blink. This can be useful if we want our face texture to
blink, but it is very rapid by default. We can use the letter "D" in a part to customize the blink rate. D followed by one character from [0-9a-zA-Z].
Specifically, the rate is determined approximately by the formula 1.0932**n - 0.9.
←Faster Slower→
0123456789abcdefghijklmnopqrstuvwxyzABCDEFGHIJKLMNOPQRSTUVWXYZ
If you are using multiple frames from the same texture file, you can shorten the string by only including the number.
For example, avatar:dude.0EHDgT2penguinT3T2T1.rwg will cycle through textures 1-3 in the penguin texture set
at a rate of "g".
You can also customize the delay between each blink with multiple D values.
For example, avatar:dude.0EHDgT2penguinT3DaT2DbT1.rwg will pause by D time between each frame.
Frames without a D value will use the default blink time.
Scaling
Besides texturing a part, we can also scale them. To scale a part, use a captial S follow by 3 characters. The 3 characters represent scaling in the X, Y, and Z dimensions. The letters can range from lowercase z (smallest) to capital Z (biggest), with 0 meaning no change. It can be visualized by this slider:
For example, avatar:dude.0EC_ABaSMhM.rwg will (S)cale the B (torso) by making it bigger
by "M" in the X and Z directions and smaller by "h" in the Y direction.
Replacing Parts
We can replace bodyparts with parts from another model for crazy customizations.
The capital G followed by another avatar name will (G)et that model's part and replace our model's with it.
For example, avatar:dude.0EHGkiwi.rwg will replace this avatar's head with a bird's head.

You can also replace a part with a completely different bodypart. Use G followed by a number code to represent the different body part you want, followed by the name of the avatar to get it from:
| 1 | Pelvis | 2 | Back | 3 | Neck | 4 | Head |
| 5 | Right Sternum | 6 | Right Shoulder | 7 | Right Elbow | 8 | Right Wrist |
| 9 | Right Fingers | 10 | Left Sternum | 11 | Left Shoulder | 12 | Left Elbow |
| 13 | Left Wrist | 14 | Left Fingers | 15 | Right Hip | 16 | Right Knee |
| 17 | Right Ankle | 18 | Right Toes | 19 | Left Hip | 20 | Left Knee |
| 21 | Left Ankle | 22 | Left Toes | 23 | Back 2 | 24 | Tail |
| 25 | Mouth | 26 | Nose | 27 | Left Ear | 28 | Right Ear |
| 29 | Back 3 | 30 | Tail 2 | 31 | Tail 3 | 32 | Tail 4 |
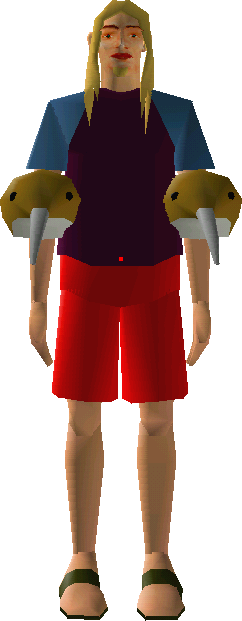
For example, we added kiwi heads to this dude's elbows with the code avatar:dude.0EHT1dudeM0G4kiwiU0G4kiwi.rwg

Some bodyparts have sub-parts to them that we want to affect.
Using the numbers 0 through 9, we can access these subclumps and customize them in the same way
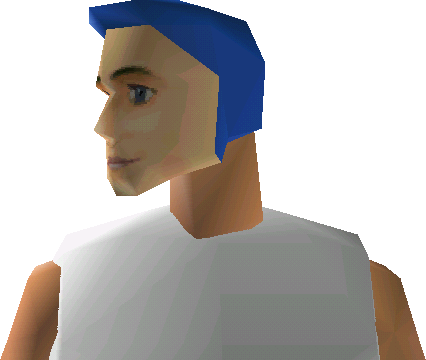
we customized the base part. For example, avatar:axel.0EHT1axel0C_B.rwg applies the color
to Axel's hair, turning it blue. If we didn't include the 0, it would've turned his face blue.
In fact, the 0th subclump of the (H)ead part is usually the hair part.

You can use the avatar string parser tool to help make sense of long, complicated avatars.
Colors and Textures
You cannot use custom textures on VIP avatars; you can only use solid colors and those textures provided by Worlds.
To define a custom color, you start with C followed by 3 characters representing the RGB value of your color. There's a total of 62 possible values, so take each value of your RGB, divide it by 255, and then multiply it by 62. That number is the index of the character in the range [0-9a-zA-Z], like the blink speed chart, of your converted value.
You can use this tool to translate an RGB color into a color code:
Or you can choose a predefined color:
| C_A | C_B | C_C | C_D | C_E | C_F | C_G | |||||||
| C_H | C_I | C_J | C_K | C_L | C_M | C_N | |||||||
| C_O | C_P | C_Q | C_R | C_S | C_T | C_U | |||||||
| C_V | C_W | C_X | C_Y | C_Z |
You can also use C__ to represent the original color of a part.
For complex textures, you'll have to choose one from the ones provided by Worlds. There are too many to list on this page, but the format will by T followed by a number 1-9 followed by the texture filename. For example, T6wab is the 6th texture in the wab.mov texture file. You can see all of available textures on the texture search page.
You can also choose textures from other avatars in this way. For example, T1dude will choose the 1st texture used on the Dude avatar (his face).
Notes
Some parts are linked to others. For example, any changes you make to the (N)eck part will be carried over to the (H)ead part. You can undo these changes by modifying the (H)ead part in reverse. For example, if you scaled the (N)eck to SoKo, you can make the (H)ead normal size by scaling it to SOkO.
A VIP avatar can be, at most, 200 characters (according to official Worlds documentation). If you go over this limit, your avatar will be reverted to a default one. To reduce the size of your avatar string, make sure to use texture slots and shortened avatar names where possible.
The actions your avatar can use depend on it's base model. A nonhuman, like avatar:vwbug, will have less or no actions while a human like Axel will have more.